Are you frustrated with blurry dental radiographs that obscure critical details, leading to potential misdiagnoses and delayed treatment? Motion blur in dental x-rays is a surprisingly common issue, often overlooked but profoundly impacting the accuracy of diagnoses. It can significantly compromise your ability to assess tooth alignment, detect subtle bone changes, and ultimately, deliver the best possible care for your patients. This guide provides a deep dive into understanding motion blur, its causes, effective troubleshooting strategies, and preventative measures – empowering you to produce consistently high-quality radiographs.
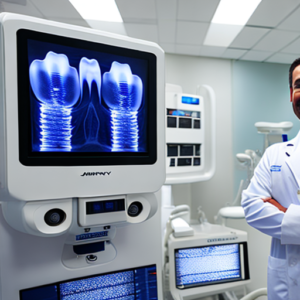
Understanding Motion Blur in Dental Radiography Motion blur arises when an image sensor (like a digital detector) captures multiple exposures during the duration of x-ray beam penetration. This typically happens when the patient moves slightly during the exposure, resulting in streaks or smudges across the image. It’s not simply a matter of ‘bad film’; modern digital sensors are incredibly sensitive and capture this movement as visible artifacts. Understanding how motion blur manifests is the first step towards effectively managing it.
Causes of Motion Blur
Several factors contribute to motion blur in dental radiographs. These can be broadly categorized into patient-related causes, equipment-related issues, and operator technique problems. Recognizing these underlying causes is crucial for implementing targeted solutions.
Patient Movement
The most frequent culprit is patient movement. Even small movements—a shift in posture, a slight tremor, or involuntary muscle contractions—can introduce significant blur. Studies have shown that up to 60 percent of dental x-ray images exhibit some degree of motion artifact, largely due to patient anxiety and difficulty maintaining stillness. A patient’s anxiety about the procedure itself can cause them to tense up and move, introducing movement during the short exposure time.
Equipment Factors
The type of digital detector used also plays a role. Older technologies like traditional film are more susceptible to motion blur than newer direct radiography (DR) systems or computed radiography (CR) systems. Furthermore, the processing algorithms applied to the raw data can amplify subtle motion artifacts if not calibrated correctly. The exposure time itself is a factor – shorter exposures increase the risk of movement being noticeable.
Operator Technique
The operator’s positioning and technique are vital in minimizing motion blur. Improper head support, incorrect collimation leading to increased radiation dose and patient discomfort (which can cause movement), and failure to adequately instruct the patient on maintaining stillness all contribute to the problem. A systematic approach to image acquisition is essential.
Recognizing Motion Blur: Identifying Artifacts
Accurately identifying motion blur is paramount for effective troubleshooting. It often presents as streaks, smudges, or hazy areas within the radiographic image, particularly in regions where movement was most likely to occur – typically around the temporomandibular joint (TMJ) and along the dental arch. Here’s what to look for:
- Streak Artifacts: These are long, linear streaks that appear as a result of multiple exposures during the exposure time.
- Smudge Artifacts: Similar to streaks but often more diffuse and irregular.
- Hazy Areas: Regions where the image appears blurred or lacking detail.
- Distorted Tooth Alignment:** In severe cases, motion blur can distort the apparent alignment of teeth, making it difficult to accurately assess occlusion.
Case Study 1: The Anxious Patient
A general dentist was reviewing a panoramic x-ray and noticed significant motion blur around the upper molars. After speaking with the patient, he discovered she was extremely anxious about dental procedures. Her anxiety caused her to tense up and move slightly during the exposure. By reassuring the patient, providing a comfortable headrest, and employing techniques for relaxation (like deep breathing), the dentist significantly reduced the motion blur in subsequent images.
Troubleshooting Motion Blur: Practical Solutions
Once you’ve identified motion blur, several strategies can be employed to mitigate its effects. These solutions range from simple adjustments to more involved techniques.
Patient Positioning and Stabilization
This is the first line of defense. Employing a robust headrest that securely supports the patient’s head is critical. Consider using foam wedges, bite blocks, or even a specialized dental head support system to minimize movement. Instruct patients to remain as still as possible during the exposure – often, simply asking them to “think about something relaxing” can help.
Technique Adjustments
Shorten the exposure time if feasible, but be mindful of radiation dose. Use appropriate collimation to reduce scatter and improve image quality while minimizing patient exposure. Utilize a low-dose technique whenever possible. Ensure proper alignment with the patient’s central axis for optimal image quality.
Equipment Settings Optimization
Calibrate your digital detector regularly according to the manufacturer’s instructions. Adjust processing parameters (such as contrast and brightness) after acquiring images to minimize the appearance of artifacts. If using a DR system, ensure proper sensor alignment is maintained. Consider utilizing post-processing software designed for artifact reduction – but be cautious about over-editing.
Step-by-Step Guide: Minimizing Motion Blur During Acquisition
| Step | Action | Rationale |
|---|---|---|
| 1 | Secure the Patient with a Headrest | Provides stability and prevents movement. |
| 2 | Instruct Patient to Remain Still | Reduces involuntary muscle contractions. |
| 3 | Shorten Exposure Time (if appropriate) | Minimizes the window for patient movement. |
| 4 | Optimize Collimation | Reduces scatter and improves image quality. |
| 5 | Take Multiple Images – Review and Select the Best | Allows for identification of images with minimal motion artifacts. |
Advanced Techniques & Software Solutions
For severe cases of motion blur, more sophisticated techniques can be employed. Some dental imaging software packages offer artifact reduction tools that utilize algorithms to smooth out blurred areas and enhance detail. However, it’s crucial to use these tools judiciously, as excessive manipulation can degrade image quality.
Conclusion
Motion blur in dental radiographs is a significant challenge but one that can be effectively managed with a combination of patient management, proper technique, and appropriate equipment settings. By understanding the causes of motion blur, recognizing its appearance, and implementing targeted solutions, you can consistently produce high-quality radiographs that contribute to accurate diagnoses and effective treatment planning. Remember, meticulous attention to detail throughout the entire imaging process is key.
Key Takeaways
- Patient anxiety is a major contributor to motion blur.
- Secure head positioning is paramount.
- Short exposure times can minimize artifact formation.
- Regular detector calibration is essential.
FAQs
- What exactly *is* motion blur in dental radiographs? It’s the appearance of streaks or smudges caused by multiple exposures during the x-ray beam penetration due to patient movement.
- How much motion blur is normal? Some degree of motion blur is common, but excessive artifact can compromise diagnostic accuracy.
- Can I reduce motion blur after taking the image? Post-processing software can help, but it’s often more effective to prevent motion blur during acquisition.
- What if my patient is very anxious? Employ relaxation techniques, a comfortable headrest, and consider a short exposure time.